Tuesday, December 13, 2011

Some holiday crafting

Over the weekend, I worked on several holiday related craft projects. First, I made a card, which I can't show you because I forgot to take a photo before I sealed it. Whoops.

I also made a snowflake wall decoration. This piece was inspired by a project Jaz did for Websters Pages two years ago. I made one then, and when I was in AC Moore the other day and saw the wooden snowflakes, I wanted to make yet another one. It's made mostly with Websters Pages products, with a few bits of bling added in.

I also made a layout, which I can't share just yet, and finally a little Melissa Frances house ornament. This little guy is going to be a gift for someone (I think it's going to be a gift, if it passes muster with my little sister). All of the paper elements are from last year's Basic Grey holiday line. I did a lot of tiny cutting to create this little thing. Here's the front:

and the back:

Please believe me when I say that the house is much smaller than it appears to be in these photos. Maybe I should have put something in the photo with the ornament for scale.

I also wanted to share some photos of the tags I made two years ago during Tim Holtz's 12 tags of Christmas that year:


I guess that's it for now. I finished two more Egypt layouts, a Websters Pages challenge layout, and did a little stitching too! I'll share all of that soon. Til then, hope the creative juices are flowing strong for everyone.

Sunday, December 11, 2011

The calm part of the trip

Okay, I figured it was about time I shared another story about our trip to Egypt last year. I can't believe it's been over a year and I still haven't finished my album! It's good that life keeps me busy, I suppose, but this is the longest it's ever taken me to finish an overseas vacation album!

The evening of our Galabea Party, we docked in Aswan, which was the southernmost part of our cruise. The differences between Aswan and Cairo (as well as most of the rest of our trip) were striking. The stall owners were less agressive, things seemed less hectic in general, and it was a wee bit warmer (okay, a lot bit warmer). Goods were cheaper, and there were items for sale here that you didn't see in the north like woven baskets and camel bone jewelry. Most of my favorite parts of the trip took place in and around this city.

We started our first day in Aswan with a boat ride to the island temple of Philae:


It was a beautiful spot in the middle of the lake, with pretty plants and flowers on the edges of the island. The temple, on the other hand, looked pretty much like most of the other temples we had seen on the trip. The novelty was starting to wear off. Just a little. Turns out, this temple, well, really, the entire island, had been transplanted when the dam was built to save it from being completely flooded. It's kind of weird to be someplace that's so old, looks so old, but really, hasn't been in its current location for even a full century.

Aswan is situated on Lake Nasser, and much of our time in Aswan was centered on the lake. I'll post more about our other trips on the lake in another post, but here's a layout I did trying to catch some of the color that I think of when I remember the lake:

Once we returned from Philae to the mainland, we boarded our bus and headed to the Aswan High Dam. We stopped for just a few moments to walk around on the top of the dam and take a few photos. The lotus style monument you see is a gift from the Russians in honor of the workers who built the dam.

From there, we walked through the Aswan rock quarry and took a look at the giant unfinished obelisk, still stuck in the ground after all these centuries. It would have been huge, but it cracked before they finished their work. The small picture of what looks like a little city is actually a cemetery. They built these little miniature homes for their dead, and will come out to their relatives' tombs to have picnics with their dead family. Quite different from what I'm used to back here at home!

I also made a layout to memorialize our tour guide, Mohammed. He was a true fount of knowledge, although there were times when I suspected he made a few things up. He definitely made the trip as wonderful as it could be. I never felt like he was rushing us, he was funny, and he was an excellent source of medicine for tummy troubles! Alton and I still quote him from time to time, our favorite phrase being "yummy shrimps" something Mohammed talked about repeatedly during our time in Cairo.

Wednesday, December 7, 2011

A patriotic pin pillow and what I won last week

Here's the thing about having limited access to stores that sell fabric or trim : I finally get a chance to browse, I find stuff to finish several items all at one time. And here's the one that I put together last night:

That's three finishes in a week, kind of amazing for me. I really like the fabric I used for the backing. Here's the back view:

When I got home from work today, I was thrilled to find two packages waiting for me. One was full of gifts that I had ordered for a family member, and the other was the prize package that I won for commenting on Tim Holtz's blog. Check out this fabulous haul!

I'm really happy with the whole thing. What a great prize, especially considering the number of prizes he gives away this time of year!

I'm trying to organize and downsize my scrapbooking products. I just gave the neighbor child a big bag full of papers and stickers. She seems really excited about it. And I've found quite a few things that the cats had temporarily misplaced for me. I also came across a bag full of tags that I created during the 12 Tags of Christmas a couple of years ago. I really need to put these things to use. Maybe use them as labels for the gifts I'm giving away this year? I'm just not sure yet...

Tuesday, December 6, 2011

Another stitching finish and tags 3 & 4

I finished another ornament from this year's JCS ornament issue. I'd been waiting for the chenille trim the pattern called for. It arrived over the weekend, and it does not disappoint. I want hand dyed chenille in every color of the rainbow! But I digress. Here's my tiny little ornament:


I created my version of Tim Holtz's day 3 & 4 tags last night. Here's tag 3:


I didn't have a big block stamp to apply multiple colors to, so I just used a bunch of Unity stamps, and applied a different color of ink to each. Again, lacking a die cut machine, I hand cut some holly leaves. THey look okay, but would probably appear more attractive if I'd remembered to distress them. And, while it was cool to play with my alcohol inks and dye the white pearls, they ended up being as sticky as red hots (because I was too impatient to let them completely dry), it would have been waaaay easier if I had remembered that I already have some red pearls and just used those instead! Live and learn.

Here's tag 4:

I'm always partial to the frosty looking tags, and this one was a lot of fun to create. For some reason, I think it's a total hoot to swirl various colors of super wet ink all over a tag! This may be my favorite tag of the first four.

I won a prize from Tim Holtz on Day 3. It's already in the mail, and I can't wait to see what it is! Til next time, happy creating, everyone!

Sunday, December 4, 2011

2nd tag -- and a finished needlework ornie

While I was in 'the big city' this weekend, I collected a few needed supplies for my holiday cross stitch ornaments, and a sheet of canvas for the 2nd Tim Holtz tag. Not sticky backed canvas, but I think I managed all right all the same. Here's my take on the second tag:


Once again, I was severely lacking in many of the things he uses, the most obvious being a die cut machine and die cuts to use therein. So I changed quite a bit up. For starters, I have no holiday kraft paper, but I did have a sheet of Tim's first release of kraft/resist papers, so I cut out a bit with music notes on it, and stamped some holly in the corner with archival ink. I also don't have any white distress stain, so I used gesso instead. I think it worked rather nicely!

Since I couldn't die cut a little canvas deer, I used a chipboard snowman I already had, glued the canvas to it, and cut the shape out with a pair of fabric scissors.


Instead of using a die cut machine to cut out a border for the bottom, I used some Websters Pages Bloomers and glued pearls into the bloomers for an accent. Let me tell you, those pearls turned out to be far more challenging than I had first anticipated! My bottle of glue started to ooze glue, so it was everywhere... on my fingers, stringing off of each pearl, and rolling slowly down the bottle. Ick. But I managed to get everything down. The bling along the right edge of the tag is also Websters Pages, an I cut three of the little red crystals off to create buttons on my canvas snowman. I finished the tag off with some rustic looking fibers and the same holiday medallion Tim used, and voila! Tag number 2 is done.

Before getting my hands completely inky yesterday evening, I also finished off another Christmas ornament. It's another Sampler Girl pattern, this time from the annual ornament issue of Just Cross Stitch. I trimmed it with some Prima lace and backed it with some adorable fabric from Mom's stash. I think it's just the cutest pattern, and I can't wait til I can add it to the stitching tree!

I almost have another stitched ornament finished up, and I'm hoping to find some time tonight/in the morning to create the tag for Day 3 as well. Til next time, happy creating everyone!

Friday, December 2, 2011

1st Tag -- Done!

There's nothing for getting a girl out of a creative slump like reading/watching Tim Holtz create his gorgeous Christmas tags! I made my interpretation of his first tag last night:


One of the things that I find most entertaining about recreating his tags is trying to come up with alternative methods for creating a look when I don't have the same materials that Tim Holtz does. For example, I do not have a die cutting/embossing machine. What I did have was some brown embossed paper. So I used some Distress Inks to color the embossed paper and sprinkled a little Marshmallow Glimmer Mist over top to try to imitate his frosted look. It's not the same, but I still think it looks pretty good.

To replace the die cut leaves, I pulled some Prima velvet leaves I happened to have, sprayed them with some Mallard Glimmer Mist to make them a bluer shade of green, and added a Distress Inked swirl at the bottom for a little more detail. My pine cones are just cardstock that I hand cut into a round, swirly state before twirling around a toothpick like Tim suggests in his video. Man, I love that toothpick tip, it makes paper pinecone/flowers soooo much easier to make! The scroll is from some Tim Holtz kraft paper, I hand cut the shape and used some Distress Inks on it. And finally, I just happened to have some pearls from another project, so drop, drop, down they go onto the tag.

You can see Tim's tag, and the instructions for how he made it here:
Tim Holtz's blog

The hardest part of the project were the letters. I glittered them right after work and left them to dry. I came back around midnight to find that they had been scattered across the floor. Ahem. I suppose I could inspect each cat to see which one has glitter butt. But I decided to take a pass this time around. What I wouldn't give for a craft room with a door so I could lock curious kittens AWAY from my works in progress!

Tuesday, November 29, 2011

Christmas decorating

So it's that time of year again, and this go around, I persuaded my significant other to let me decorate his shiny new house. We kept things relatively low key: a few lights outside, a tree, and a few other items in the main part of the house. Neither of us had ever decorated the outside of a house before. We'll try more next year, but I don't think we did too bad for our first try:

I put my stitched ornament tree on the console in the entry hall:

Princess and Scout were both visiting his house, and they like the tree:


In other "stitchy" news, I actual have a photo to share! I've worked here and there on quite a few different pieces, but only one that I've completely finished. Well, maybe I've finished it. I stitched the Sampler Girl's freebie pattern, "C'est Noel" and turned it into a pillow. This was my first time trying to stitch a pillow showing some of the decorative fabric on the front. I hand stitch all my ornaments, and it was quite a challenge to try to line up that green fabric to make a straight-ish bottom! I used scrapbooking products to finish it off, include some red Bloomers from Webster's Pages, a long safety pin from 7 Gypsies, and a Tim Holtz holiday trinket. I want to add a simple trim around the border of the pillow, but ended up not liking what I'd originally chosen. I don't know, do you think it needs more trim to look truly finished?

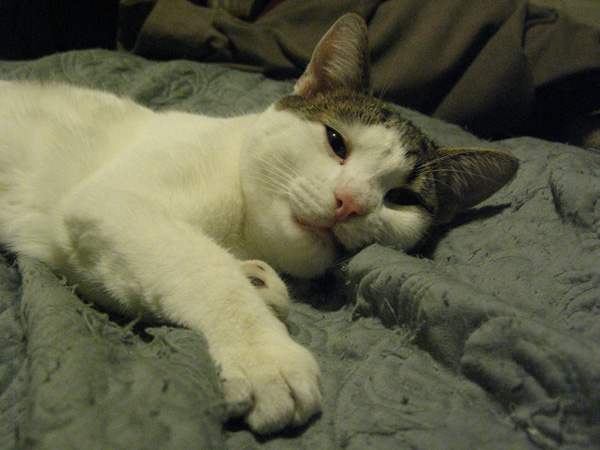
And finally, in cat news, SOMEBODY has made himself right at home. I think he thinks he's found a forever home...